
Apple Mac is one of the best devices to use. This, undoubtedly, has so many dynamic options and everything you need in order to perform your task efficiently and effectively. However, Windows is no less compared with the Mac. In order to better serve customers, Apple has released the latest macOS version named after macOS Monterey to improve the stability, performance, or compatibility of your Mac.
Compared with macOS Big Sur, macOS Monterey is a smaller update but it is still full of new features that improve the Mac experience. Universal Control is perhaps one of the biggest updates, which bridges the gap between desktop and tablet. With this feature, what you would do is move your mouse cursor from your trackpad on your MacBook Pro over to your iPad to the edge of the screen and then it would seamlessly jump to the iPad.
This new macOS is impressive but some people still complain in forums that they can’t copy, edit, or transfer files from NTFS-formatted external drives on macOS Monterey. Why is your NTFS drive read-only on Macs? Actually, it’s been a common incompatibility issue between Mac and Windows over years. Actually, Microsoft has a proprietary file system called NTFS. Macs can only read NTFS drives by default and cannot write to NTFS drives. And the latest macOS 12 is no exception.
Although this may seem a severe problem, the best solution is using a third-party application that allows Mac users to read and write NT file system (NTFS) formatted external drives on Mac conveniently. Such a program that allows users to do so is particularly designed to provide support for reading and writing NTFS drives on Mac.
Ways to Read/Write NTFS-Formatted Drives on macOS 12
Once there is a will, there is a way. Taking this adage into consideration, to date, two or three ways have been introduced. Those are:
Through A Third-Party Application
Using a third-party application to read and write NTFS drives on macOS 12 is the most effective yet simplest way among all the other ways. The reason is third-party applications are designed particularly to support NTFS for Mac. Now that there are many third-party NTFS for Mac applications in the market, which one should be a good choice for you? Well, the straightforward answer to this question is iBoysoft NTFS for Mac which encompasses everything you need in order to read, write, copy, move, delete, edit and so on without any hassle.
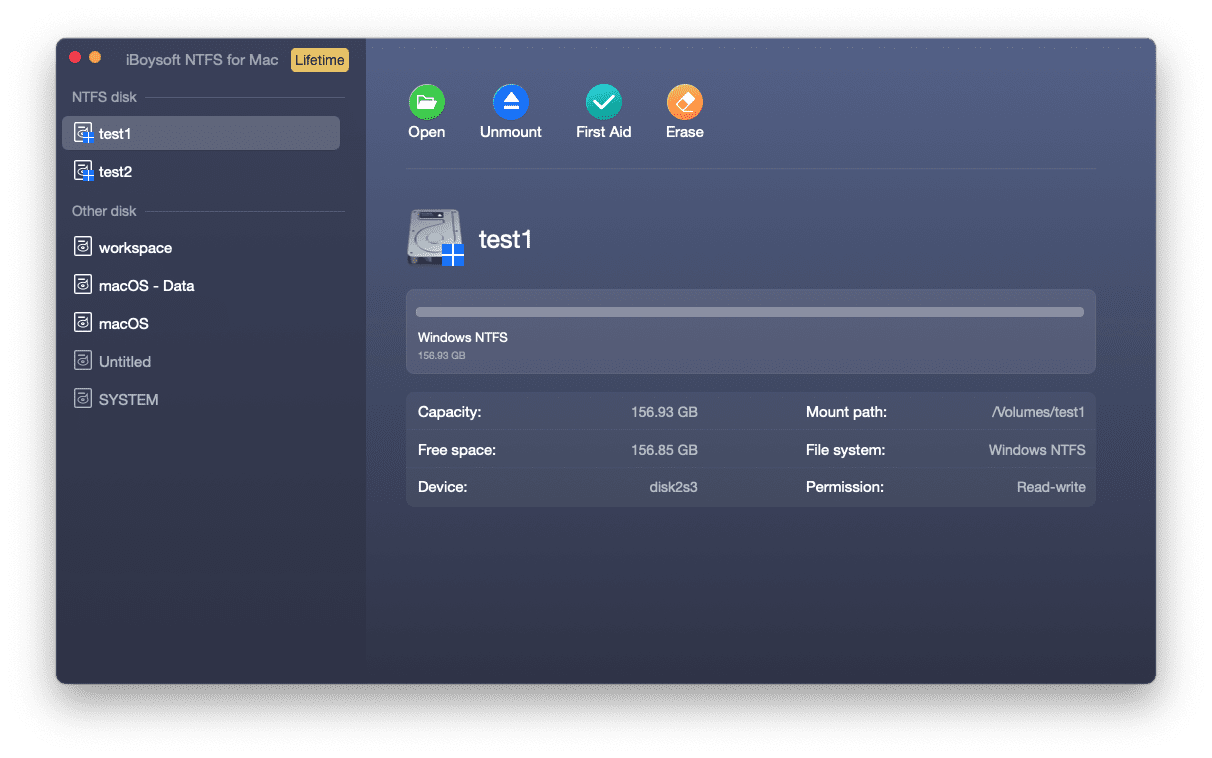
Using the iBoysoft NTFS for Mac application to achieve your goal, you need to go through the following steps:
- Directly download iBoysoft NTFS for Mac from its official website and follow the on-screen instruction to complete the installation.
- Plug your NTFS disk into the Mac machine running with macOS 10.13 and later versions.
- Launch the iBoysoft NTFS for Mac program. Now, you are able to write to NTFS drives on Mac easily.
It is worth mentioning that you won’t have to think about your files’ safety because iBoysoft NTFS for Mac exploited the latest technology with the view to make sure your files are intact while your Mac is supporting the NTFS formatted drive and allowing you to read/write according to your preference.
Through Terminal
Of the different ways to read and write NTFS-formatted drives, Terminal is one of the known and oldest ways to do so. However, using the Terminal of your Mac to make your NTFS readable and writable is not a good decision since it contains risks of losing data to a great extent.
Here are the steps to write NTFS drives with Terminal:
- Open Finder -> Applications folder -> Utilities -> Terminal after connecting your NTFS drive to your Mac machine.
- After launching Terminal, type the command: sudo nano /etc/fstab to open the /etc/fstab file for editing nano text editor.
- Type the LABEL=NAME none ntfs rw,auto,nobrowse command in the window. Don’t forget to change NAME into the name of your NTFS drive.
- Press “CTRL+O” and hit “Enter” to save the fstab file.
- Press “CTRL+X” to exit the Terminal window.
- Navigate to Finder > Go > Go to Folder, input /Volumes in the box and then click Go.
If the above-mentioned commands have no effect on macOS Monterey, here is another set of commands for you to enable write support on macOS Monterey.
Step 1: Launch Terminal, type sudo umount Volumes/DISKNAME, and hit the enter key to make your disk unmountable. Here, DISKNAME should be the real name of your disk.
Step 2: Mount your NTFS disk in read-write mode by inputting sudo mount -t ntfs -o rw, auto, nobrowse /dev/disk2s2 /Volumes/1. Replace disk2s2 with the device info of your NTFS drive in Disk Utility.
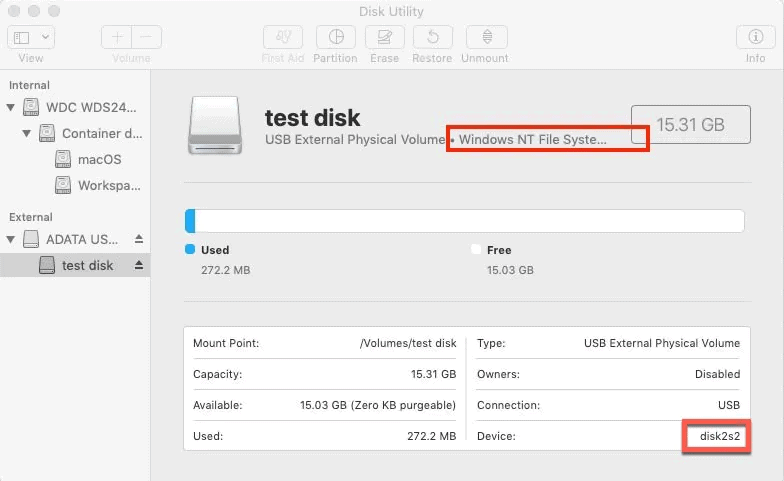
Step 3: Exit Terminal to check if this set of commands can work.
Through formatting the NTFS drive to exFAT/FAT32
In fact, exFAT and FAT32 file systems are fully compatible with Mac and PC. As a user, you can make full use of this feature to convert the NTFS drive to exFAT/FAT32 file system so that you can gain the full read-write permission on Mac.
Step 1: Copy the important files out from your NTFS drive and save them on a healthy drive to prevent them from being erased during the formatting process.
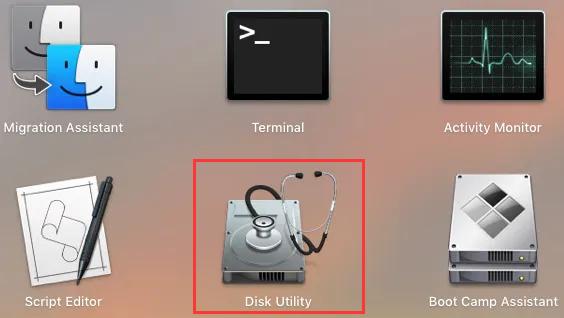
Step 2: Open Launchpad > Other > Disk Utility.
Step 3: Select the NTFS drive from the left panel in the Disk Utility window and choose the Erase option from the top menu of Disk Utility.
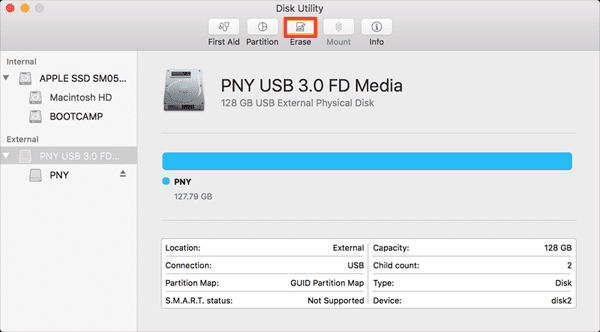
Step 4: Give the drive a new name, select “exFAT” or “FAT32” file system from the drop-down box and finally click Erase.
Summing Up
In the above discussion about the way to read and write NTFS drives on macOS Monterey, it is clear and noticeable that using a third-party application is the best way to make your NTFS formatted drive compatible with your Mac machine so that you can do everything you want. And regarding choosing the best application, hurry and go for the iBoysoft NTFS for Mac tool because it not only provide what you need but at a reasonable price which is $19.95 for 1-year subscription, insane!

![How to Transfer WhatsApp from Android to iPhone Without Factory Reset iPhone [Simple Ways]](https://www.voddler.com/wp-content/uploads/2024/01/Picture1-350x250.png)


